Transform complex data into powerful insights by mastering hands-on machine learning with Python – the fastest-growing approach to building intelligent systems. Start building AI models in Python today using industry-standard libraries like scikit-learn, TensorFlow, and PyTorch, even with minimal programming experience.
Machine learning doesn’t have to be intimidating. This practical guide walks you through real-world projects, from data preprocessing to model deployment, using clear examples and executable code. You’ll learn to implement classification algorithms, train neural networks, and solve actual business problems while building a solid foundation in ML fundamentals.
Whether you’re a student, data scientist, or software developer, this hands-on approach ensures you’ll master essential concepts by doing rather than just reading. We’ll cover everything from basic regression models to advanced deep learning techniques, with each lesson building upon real-world applications and industry best practices.
Skip the theoretical complexities and dive straight into building working models. By the end of this guide, you’ll have created multiple machine learning projects and developed the practical skills needed to implement AI solutions in your own work.
Setting Up Your Python ML Environment

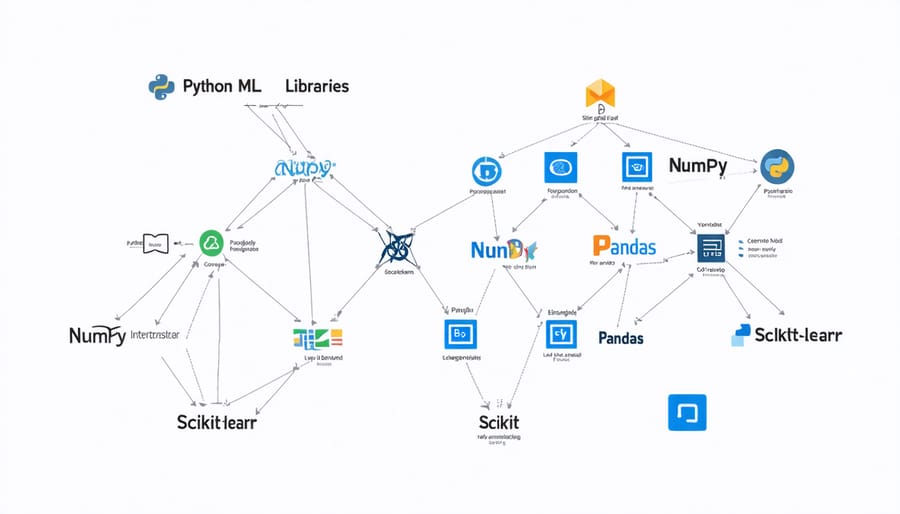
Essential Python Libraries for ML
Before diving into machine learning projects, it’s essential to understand AI and ML differences and set up the right tools. Python offers powerful libraries that form the foundation of any ML project. Let’s explore the three most crucial ones:
NumPy serves as the cornerstone for numerical computing in Python. It provides efficient array operations and mathematical functions that are essential for handling large datasets. Install it using: pip install numpy
Pandas is your go-to library for data manipulation and analysis. It introduces DataFrames, which make working with structured data as intuitive as using spreadsheets. Get started with: pip install pandas
Scikit-learn is the Swiss Army knife of machine learning in Python. It offers a consistent interface for implementing various ML algorithms, from basic classification to complex neural networks. Install it with: pip install scikit-learn
These libraries work seamlessly together: NumPy handles the mathematical operations, Pandas prepares your data, and Scikit-learn brings the ML algorithms to life. With these tools installed, you’re ready to begin your machine learning journey.
Jupyter Notebook Setup
Jupyter Notebook provides an ideal environment for machine learning development, combining code execution with rich documentation capabilities. To get started, install Jupyter using pip by running `pip install jupyter` in your terminal. Once installed, navigate to your desired working directory and launch Jupyter by typing `jupyter notebook` in your command line.
After the server starts, your default web browser will open automatically, displaying the Jupyter dashboard. Create a new Python notebook by clicking the “New” button and selecting “Python 3” from the dropdown menu. You’ll be presented with an interactive environment where you can write and execute code in individual cells.
For machine learning projects, it’s recommended to start your notebook with import statements for essential libraries like NumPy, Pandas, and Scikit-learn. The cell-based structure allows you to experiment with different approaches and visualize results immediately, making it perfect for iterative ML development.
To make the most of Jupyter, familiarize yourself with keyboard shortcuts (press H to view them) and cell types (code and markdown) for better documentation. Remember to save your work regularly using the save icon or Ctrl+S (Cmd+S on Mac).

Your First ML Project: Predicting House Prices
Loading and Exploring the Dataset
Before diving into machine learning algorithms, we need to understand how to properly load and explore our dataset. This crucial first step sets the foundation for successful model development.
Let’s start by importing essential Python libraries. The pandas library is your best friend for data manipulation, while numpy handles numerical operations efficiently. Here’s a typical setup:
“`python
import pandas as pd
import numpy as np
import matplotlib.pyplot as plt
“`
To load your dataset, pandas offers several methods depending on your file format. For CSV files, it’s as simple as:
“`python
data = pd.read_csv(‘your_dataset.csv’)
“`
Once loaded, examine your data using these fundamental exploration techniques:
1. Get a quick overview with `data.head()` to display the first few rows
2. Check basic statistics using `data.describe()`
3. Identify missing values with `data.isnull().sum()`
4. Understand data types via `data.info()`
Understanding your data’s structure is vital. Look for patterns, outliers, and potential issues that might affect your model’s performance. Visual exploration using matplotlib or seaborn can reveal insights that aren’t immediately obvious in raw numbers:
“`python
plt.hist(data[‘target_column’])
plt.show()
“`
Remember to check for data quality issues like:
– Missing or null values
– Incorrect data types
– Outliers
– Imbalanced classes (for classification problems)
– Inconsistent formatting
This initial exploration helps you make informed decisions about data preprocessing steps, feature selection, and model choice.

Building the Linear Regression Model
Now that we’ve prepared our data, let’s dive into building our linear regression model. Understanding these Python machine learning fundamentals will serve as the foundation for more complex models in your future projects.
First, import the necessary libraries:
“`python
from sklearn.linear_model import LinearRegression
from sklearn.model_selection import train_test_split
“`
Split your dataset into training and testing sets:
“`python
X_train, X_test, y_train, y_test = train_test_split(X, y, test_size=0.2, random_state=42)
“`
Create and train the model in just three lines of code:
“`python
model = LinearRegression()
model.fit(X_train, y_train)
predictions = model.predict(X_test)
“`
This simplicity is one of the beauties of scikit-learn! The fit() method trains your model using your training data, while predict() generates predictions for your test set.
To evaluate your model’s performance, calculate key metrics:
“`python
from sklearn.metrics import mean_squared_error, r2_score
mse = mean_squared_error(y_test, predictions)
r2 = r2_score(y_test, predictions)
“`
The mean squared error (MSE) helps you understand the average prediction error, while the R-squared value indicates how well your model fits the data. Lower MSE and higher R-squared values generally indicate better model performance.
Remember to inspect your model’s coefficients and intercept:
“`python
print(“Coefficients:”, model.coef_)
print(“Intercept:”, model.intercept_)
“`
These values show how each feature influences your predictions and can provide valuable insights into your data relationships.
Model Evaluation and Improvement
After building your machine learning model, it’s crucial to evaluate its performance and make necessary improvements. Start by splitting your dataset into training and testing sets – typically using an 80-20 split. This helps ensure your model can generalize well to new, unseen data.
Common evaluation metrics include accuracy, precision, recall, and F1-score for classification problems, and mean squared error (MSE) or R-squared for regression tasks. For instance, if you’re building a spam detection model, you’ll want to look at both accuracy and precision to ensure you’re not just catching spam but also avoiding false positives.
To improve your model’s performance, consider these key strategies:
Cross-validation: Instead of a single train-test split, use k-fold cross-validation to get a more robust assessment of your model’s performance.
Hyperparameter tuning: Use techniques like grid search or random search to find the optimal parameters for your model. Python’s scikit-learn library makes this process straightforward with GridSearchCV.
Feature engineering: Create new features or transform existing ones to help your model better understand the underlying patterns in your data.
Handle overfitting: If your model performs significantly better on training data than test data, try regularization techniques or reduce model complexity.
Address class imbalance: For classification problems with uneven class distribution, consider using techniques like SMOTE or adjusting class weights.
Remember to document your evaluation process and keep track of different model versions. This helps you understand which changes led to improvements and ensures reproducibility of your results.
Common ML Pitfalls and Solutions
Dealing with Missing Data
Missing data is a common challenge in real-world machine learning projects. When working with datasets, you’ll often encounter incomplete entries that can significantly impact your model’s performance. Python offers several practical approaches to handle these gaps effectively.
The simplest method is to drop rows with missing values using pandas’ dropna() function. While straightforward, this approach might result in losing valuable information, especially with smaller datasets. For example:
“`python
cleaned_data = df.dropna()
“`
A more nuanced approach is imputation – replacing missing values with calculated estimates. You can use mean, median, or mode imputation depending on your data’s characteristics:
“`python
df[‘column’].fillna(df[‘column’].mean())
“`
For more sophisticated handling, Scikit-learn’s SimpleImputer class offers various strategies. It can handle multiple columns simultaneously and integrates seamlessly with ML pipelines:
“`python
from sklearn.impute import SimpleImputer
imputer = SimpleImputer(strategy=’mean’)
X_imputed = imputer.fit_transform(X)
“`
Some advanced techniques include:
– KNN imputation: Uses similar records to estimate missing values
– Multiple imputation: Creates several complete datasets to account for uncertainty
– Forward/backward fill: Uses adjacent values in time series data
Choose your method based on your dataset’s size, the percentage of missing values, and the type of data you’re working with. Remember that different approaches might be suitable for different columns within the same dataset.

Preventing Overfitting
Overfitting occurs when your machine learning model performs exceptionally well on training data but fails to generalize to new, unseen data. To help you visualize machine learning concepts, think of it like memorizing exam answers without understanding the underlying principles.
Here are essential techniques to prevent overfitting:
1. Cross-validation: Split your data into multiple folds and train your model on different combinations to ensure robust performance.
2. Regularization: Add penalties to your model’s complexity using techniques like L1 (Lasso) or L2 (Ridge) regularization to discourage overcomplex solutions.
3. Data augmentation: Increase your training dataset size by creating modified versions of existing data through techniques like rotation, scaling, or adding noise.
4. Early stopping: Monitor your model’s performance on a validation set and stop training when performance starts to degrade.
5. Dropout: Randomly disable neurons during training to prevent over-reliance on specific features.
Implementation example in Python:
“`python
from sklearn.model_selection import cross_val_score
from sklearn.linear_model import Ridge
model = Ridge(alpha=1.0) # Alpha controls regularization strength
scores = cross_val_score(model, X, y, cv=5)
“`
Remember to always maintain a separate test set for final evaluation and regularly validate your model’s performance on new data.
Feature Selection Best Practices
Feature selection is a crucial step in building effective machine learning models, as it helps reduce noise and improve model performance. Start by examining the correlation between your features using visualization tools like heatmaps and scatter plots. Look for features that have strong relationships with your target variable while avoiding highly correlated predictors that could cause multicollinearity.
Consider using automated selection methods such as recursive feature elimination (RFE), which systematically removes the least important features based on model performance. For classification tasks, information gain and chi-square tests can help identify features that best distinguish between classes.
Remember to scale your features appropriately before selection. Standardization or normalization ensures that features with different ranges don’t unfairly influence the selection process. Domain knowledge is equally important – sometimes a feature might seem statistically insignificant but could be crucial based on business requirements or real-world constraints.
Watch out for common pitfalls like removing features too aggressively or relying solely on automated methods. A good practice is to use multiple selection techniques and compare their results. For example, combine filter methods (like correlation analysis) with wrapper methods (like forward selection) to get a more robust feature set.
Always validate your feature selection choices through cross-validation to ensure they generalize well to unseen data. Document your selection process and rationale – this helps with model maintenance and future improvements.
Next Steps in Your ML Journey
Now that you’ve gotten your hands dirty with Python and machine learning basics, it’s time to chart your path forward. The ML landscape is vast and exciting, with countless opportunities to grow your expertise.
Start by reinforcing your foundation through personal projects. Choose problems that genuinely interest you – whether it’s analyzing your favorite sports team’s statistics or predicting stock market trends. Real-world applications help cement your understanding and build a compelling portfolio.
Consider joining online ML communities on platforms like Kaggle, GitHub, or Reddit’s r/MachineLearning. These spaces offer invaluable peer learning opportunities, code reviews, and exposure to diverse problem-solving approaches. Participating in Kaggle competitions, even if you don’t win, provides excellent hands-on experience with real datasets and common industry challenges.
To structure your learning journey, consider pursuing a professional ML certification. While not mandatory, certifications can validate your skills and open doors to career opportunities.
Advanced topics to explore include:
– Deep Learning and Neural Networks
– Natural Language Processing
– Computer Vision
– Reinforcement Learning
– Time Series Analysis
Remember to stay practical as you advance. Each new concept should be accompanied by hands-on implementation. Build increasingly complex projects that combine multiple techniques, and don’t shy away from experimenting with cutting-edge libraries and frameworks.
Keep your GitHub repository active with your projects and contributions to open-source ML projects. This showcases your growth and helps you connect with the broader ML community. Finally, consider specializing in a particular domain like healthcare, finance, or robotics where ML applications are transforming industries.
The key is consistent practice and patience. Machine learning is a rapidly evolving field, so maintain a mindset of continuous learning and exploration.
Throughout this journey into hands-on machine learning with Python, we’ve explored the fundamental concepts, essential tools, and practical applications that form the backbone of modern ML development. By now, you should feel confident in setting up your development environment, understanding basic ML algorithms, and implementing your first models.
Remember that machine learning is an iterative process – your first model rarely becomes your final solution. The key takeaways from our exploration include the importance of proper data preprocessing, the critical role of feature engineering, and the necessity of model evaluation and validation. We’ve seen how Python’s rich ecosystem of libraries makes implementing complex ML solutions more accessible and efficient.
As you continue your machine learning journey, focus on building your portfolio with diverse projects. Start small, but don’t be afraid to tackle increasingly complex challenges. Keep exploring new algorithms, stay updated with the latest developments in the field, and participate in online communities where you can share knowledge and learn from others’ experiences.
The field of machine learning is constantly evolving, with new techniques and tools emerging regularly. Make continuous learning a habit – explore advanced topics like deep learning, reinforcement learning, and natural language processing. Consider participating in Kaggle competitions or contributing to open-source ML projects to gain practical experience.
Remember, the best way to learn is by doing. Take the concepts we’ve covered and apply them to real-world problems that interest you. Start with small datasets, experiment with different algorithms, and gradually work your way up to more complex challenges. Your journey in machine learning is just beginning, and the possibilities are endless.

