

Transform your AI workflow today with powerful automation tools that streamline data processing, enhance model accuracy, and accelerate development cycles. Modern AI platforms like AutoML, TensorFlow, and PyTorch now offer intuitive interfaces that make advanced machine learning accessible to developers at all skill levels.
Following AI model training best practices, these tools eliminate the complexity of manual coding while maintaining professional-grade results. Whether you’re building predictive models, analyzing natural language, or developing computer vision applications, today’s AI tools provide ready-to-use solutions that previously required extensive programming expertise.
This practical guide walks you through the essential AI tools that are revolutionizing the development landscape. From no-code platforms perfect for beginners to sophisticated frameworks for experienced developers, you’ll discover how to leverage these technologies to create robust AI solutions efficiently. Learn to automate repetitive tasks, implement advanced algorithms, and deploy models with just a few clicks – all while maintaining full control over your project’s architecture and performance.
Understanding Automated Feature Selection
The Problem With Manual Feature Selection
While manual feature selection can be valuable, it comes with significant challenges that can impact your machine learning projects. One major issue is the time-consuming nature of the process – data scientists often spend countless hours analyzing and selecting features, which could be better spent on data quality optimization and model development.
Human bias is another critical concern. When selecting features manually, we tend to rely on our assumptions and preconceptions, potentially overlooking important patterns that aren’t immediately obvious. This can lead to suboptimal model performance and missed opportunities for discovering valuable insights.
Scalability presents another challenge. As datasets grow larger and more complex, manual feature selection becomes increasingly impractical. Imagine trying to evaluate thousands of features by hand – it’s not only inefficient but also prone to errors and inconsistencies.
Additionally, manual selection often struggles to identify complex feature interactions. While humans excel at understanding individual feature importance, we may miss subtle relationships between multiple features that could significantly impact model performance. This limitation can result in models that fail to capture the full complexity of the underlying patterns in your data.
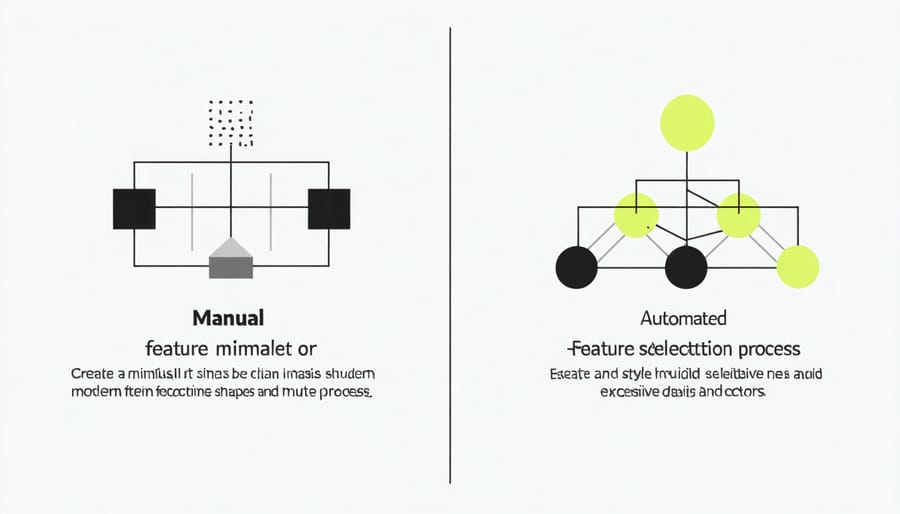
Benefits of Automation in Feature Selection
Automated feature selection brings several game-changing benefits to your AI and machine learning projects. First, it dramatically reduces the time spent on manual analysis, allowing you to process large datasets in minutes instead of hours or days. This efficiency boost lets you focus more on model development and fine-tuning.
Another significant advantage is the reduction of human bias. Automated tools evaluate features based on mathematical principles and statistical relationships, ensuring more objective selection than human intuition alone. This leads to more reliable and reproducible results across different projects.
These tools also excel at identifying complex feature interactions that might be missed during manual analysis. By automatically testing various feature combinations, they can uncover hidden patterns and relationships that significantly improve model performance.
Cost-effectiveness is another key benefit, as automation reduces the need for extensive domain expertise in feature engineering. This makes advanced machine learning more accessible to teams with limited resources. Additionally, automated feature selection helps prevent overfitting by systematically eliminating redundant or irrelevant features, resulting in more robust and generalizable models.
Popular AI Tools for Feature Selection
Scikit-learn’s SelectKBest
SelectKBest is a powerful feature selection tool from scikit-learn that helps identify the most important features in your dataset. It works by scoring each feature using statistical tests and selecting the top K features based on these scores.
To implement SelectKBest, first import it from scikit-learn’s feature_selection module:
“`python
from sklearn.feature_selection import SelectKBest, f_classif
“`
Here’s a simple example of how to use it:
“`python
# Create SelectKBest object
selector = SelectKBest(score_func=f_classif, k=5)
# Fit and transform your data
X_selected = selector.fit_transform(X, y)
“`
The score_func parameter determines which statistical test to use. Common options include:
– f_classif: F-test for classification tasks
– mutual_info_classif: Mutual information for classification
– f_regression: F-test for regression tasks
– mutual_info_regression: Mutual information for regression
To see which features were selected and their scores:
“`python
# Get selected feature names
selected_features = X.columns[selector.get_support()]
# Get feature scores
feature_scores = selector.scores_
“`
SelectKBest works best when your features are on similar scales, so consider normalizing your data first. Remember that while SelectKBest is straightforward to use, it evaluates features independently and might miss important feature interactions.
Feature Selection with Random Forest
Random Forest is a powerful machine learning algorithm that can also serve as an excellent tool for feature selection. By analyzing how each feature contributes to the model’s decision-making process, Random Forest can help you identify which variables are most important for your predictions.
The algorithm works by creating multiple decision trees and combining their outputs. During this process, it naturally calculates feature importance scores based on how frequently each feature is used to make significant splits in the trees. Features that consistently lead to better predictions receive higher importance scores.
To implement feature selection with Random Forest in Python, you can use the scikit-learn library. Here’s a practical example:
“`python
from sklearn.ensemble import RandomForestClassifier
rf_model = RandomForestClassifier()
rf_model.fit(X_train, y_train)
feature_importance = rf_model.feature_importances_
“`
The feature_importances_ attribute provides a numerical score for each feature, where higher values indicate greater importance. You can then rank your features based on these scores and select the top performers for your final model.
One of the key advantages of using Random Forest for feature selection is its ability to handle both numerical and categorical data without extensive preprocessing. It’s also relatively resistant to overfitting and can capture non-linear relationships between features.
When applying this technique, remember to:
– Use cross-validation to ensure stable importance rankings
– Consider feature correlations alongside importance scores
– Validate the selected features’ performance on a test set

LASSO and Elastic Net
LASSO (Least Absolute Shrinkage and Selection Operator) and Elastic Net are powerful feature selection techniques that help streamline your machine learning models by automatically identifying the most relevant features. Think of LASSO as a skilled gardener who prunes away unnecessary branches, leaving only the most productive ones.
Using scikit-learn, implementing LASSO is straightforward:
“`python
from sklearn.linear_model import Lasso
lasso = Lasso(alpha=0.1)
lasso.fit(X_train, y_train)
“`
The alpha parameter controls the strength of the regularization – higher values create simpler models by eliminating more features. As you tune your ML models, you’ll find the sweet spot between simplicity and accuracy.
Elastic Net combines LASSO’s feature selection capabilities with Ridge regression’s ability to handle correlated features. Here’s how to implement it:
“`python
from sklearn.linear_model import ElasticNet
elastic = ElasticNet(alpha=0.1, l1_ratio=0.5)
elastic.fit(X_train, y_train)
“`
The l1_ratio parameter balances between LASSO and Ridge penalties. A value of 0.5 gives equal weight to both, while values closer to 1 make the model behave more like LASSO.
Both techniques automatically assign zero coefficients to less important features, effectively removing them from your model. This not only improves model interpretability but also helps prevent overfitting.
Boruta Algorithm
The Boruta algorithm serves as a powerful feature selection tool that helps identify all relevant features in your dataset, making it invaluable for machine learning projects. Unlike traditional methods that select a minimal subset of features, Boruta aims to find all features that are somehow relevant to your target variable.
The algorithm works by creating “shadow” features – randomized copies of your original features – and comparing their importance against the real ones. It runs multiple iterations of a Random Forest classifier, gradually eliminating features that consistently perform worse than their shadow counterparts.
Here’s a simple example using Python:
“`python
from boruta import BorutaPy
from sklearn.ensemble import RandomForestClassifier
# Initialize Boruta
rf = RandomForestClassifier(n_jobs=-1)
boruta = BorutaPy(rf, n_estimators=’auto’, verbose=2)
# Fit Boruta
boruta.fit(X, y)
# Get selected features
selected_features = X.columns[boruta.support_]
“`
The algorithm marks features as ‘confirmed’, ‘tentative’, or ‘rejected’ based on their statistical significance. This approach is particularly useful when you need to understand which features truly contribute to your model’s predictions, rather than just finding the minimal set needed for good performance.
One key advantage of Boruta is its ability to handle complex interactions between features, making it especially valuable for datasets where feature relationships aren’t immediately apparent. However, be mindful that it can be computationally intensive for large datasets.
Implementing Automated Feature Selection
Setting Up Your Environment
Before diving into AI tools, let’s set up a proper working environment. You’ll need Python 3.7 or later installed on your system, along with several essential libraries. Start by creating a new virtual environment to keep your project dependencies isolated.
First, install the following core packages using pip:
“`python
pip install numpy pandas scikit-learn tensorflow
pip install jupyter matplotlib seaborn
“`
These libraries provide the foundation for working with AI tools. NumPy and Pandas handle data manipulation, scikit-learn offers machine learning capabilities, and TensorFlow enables deep learning functionalities.
For a smoother development experience, we recommend using either Jupyter Notebook or Visual Studio Code with Python extensions. Both provide excellent interactive environments for experimenting with AI tools.
Create a new project directory and initialize it with a requirements.txt file containing your dependencies. This ensures your environment remains consistent and reproducible:
“`python
numpy>=1.19.2
pandas>=1.2.0
scikit-learn>=0.24.0
tensorflow>=2.4.0
jupyter>=1.0.0
matplotlib>=3.3.0
seaborn>=0.11.0
“`
With this setup complete, you’re ready to start exploring AI tools and building your first projects.

Code Implementation Examples
Here are some practical code examples using popular AI tools for feature selection:
Using Scikit-learn’s SelectKBest:
“`python
from sklearn.feature_selection import SelectKBest, f_classif
# Create and fit the selector
selector = SelectKBest(score_func=f_classif, k=5)
X_selected = selector.fit_transform(X, y)
# Get selected feature names
selected_features = X.columns[selector.get_support()]
“`
Implementing Random Forest for feature importance:
“`python
from sklearn.ensemble import RandomForestClassifier
# Train Random Forest
rf_model = RandomForestClassifier()
rf_model.fit(X, y)
# Get feature importance scores
importance = rf_model.feature_importances_
for feat, imp in zip(X.columns, importance):
print(f'{feat}: {imp:.4f}’)
“`
Using SHAP values for feature explanation:
“`python
import shap
# Create explainer
explainer = shap.TreeExplainer(model)
shap_values = explainer.shap_values(X)
# Plot feature importance
shap.summary_plot(shap_values, X)
“`
Remember to preprocess your data before applying these methods. Each example can be customized based on your specific dataset and requirements. These implementations work well with popular frameworks like pandas and numpy, making them ideal for both beginners and experienced practitioners.
Best Practices and Common Pitfalls
When working with AI tools, following established best practices can significantly improve your results. Start by thoroughly understanding your data before applying any AI algorithms. Always clean and preprocess your data properly, removing duplicates and handling missing values appropriately.
Document your processes and maintain version control of your models. This practice helps track changes and makes it easier to identify what works best. Regular testing and validation of your models prevent overfitting and help avoid common model failures.
Common pitfalls to watch out for include:
– Rushing into complex models without mastering basics
– Neglecting to validate assumptions about your data
– Over-relying on automation without understanding the underlying processes
– Using default parameters without proper tuning
– Failing to monitor model performance over time
Remember to start small and scale gradually. Begin with simpler models and add complexity only when necessary. This approach helps build a solid foundation while maintaining control over your AI implementation process.
As we’ve explored throughout this guide, AI tools have become increasingly accessible and powerful, offering exciting opportunities for both beginners and professionals alike. The key to success lies in starting with the basics, understanding your specific needs, and gradually building your expertise with these transformative technologies.
Remember to begin with user-friendly tools like AutoML platforms and no-code solutions before diving into more complex implementations. This approach allows you to gain confidence while achieving practical results early in your learning journey. As you progress, you can explore more sophisticated tools and customize them to meet your unique requirements.
Keep in mind that the AI landscape is constantly evolving, so staying updated with the latest developments and best practices is crucial. Join online communities, participate in forums, and follow industry leaders to remain current with emerging trends and tools.
Start your AI journey today by implementing what you’ve learned in this tutorial. Begin with a small project, apply the concepts we’ve covered, and gradually expand your toolkit as you gain experience. Whether you’re automating tasks, analyzing data, or building intelligent applications, the foundations we’ve discussed will serve as your stepping stones to success in the world of artificial intelligence.
Remember, the most important step is to take action. Choose a tool that aligns with your current skill level and start experimenting. Your AI journey begins now!