
Learning computer vision takes about six to twelve months of consistent study and hands-on practice, progressing from Python fundamentals through neural network architectures to real-world project deployment. You’ll move through a structured sequence: master prerequisite programming skills, understand image processing basics, learn deep learning frameworks, implement classic computer vision algorithms, and finally build portfolio projects that demonstrate your capabilities.
Computer vision sits at the intersection of artificial intelligence and visual perception, teaching machines to interpret images and videos the way humans do. Right now, these systems power facial recognition on your phone, enable autonomous vehicles to detect pedestrians, help doctors identify tumors in medical scans, and allow robots to navigate warehouses. The field has become more accessible than ever in 2026, with open-source frameworks, free datasets, and cloud computing resources available to anyone willing to put in the work.
The learning curve feels steep at first because computer vision combines multiple disciplines: linear algebra for understanding transformations, calculus for grasping how neural networks learn, programming for implementation, and domain knowledge for solving actual problems. Most beginners make the mistake of jumping straight into advanced architectures without building a foundation, then hit a wall when they can’t debug their models or adapt techniques to new problems.
This guide breaks the journey into clear stages you can tackle one at a time. You’ll learn exactly what tools you need (spoiler: you don’t need expensive hardware to start), which common pitfalls will waste your time, and how to verify you’ve actually gained practical skills rather than just following tutorials. By the end, you won’t just understand computer vision concepts. You’ll be able to build working systems that solve real problems.
What You’ll Need to Get Started
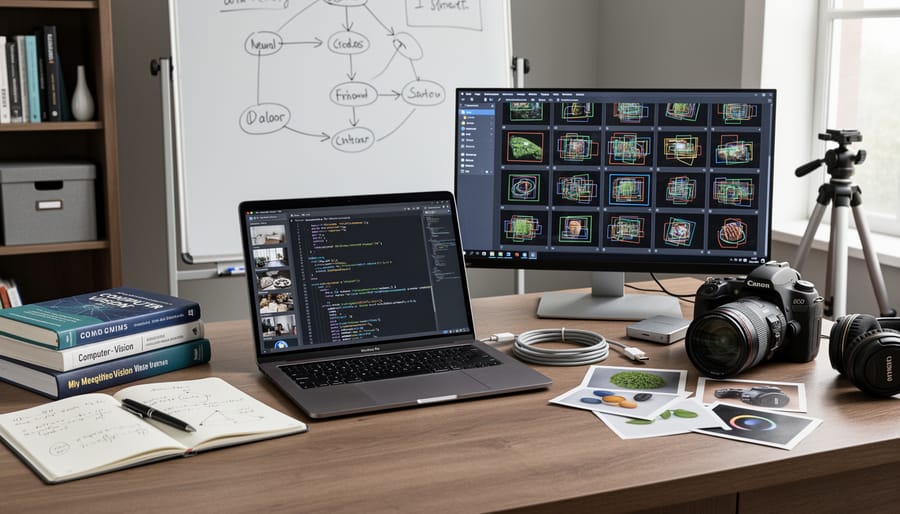
You don’t need expensive equipment to start learning computer vision. A mid-range laptop with 8GB RAM and a decent processor handles most beginner projects comfortably. Integrated graphics work fine for the first few months while you’re learning fundamentals. You’ll eventually want access to a GPU for training deep learning models, but cloud platforms like Google Colab and Kaggle provide free GPU hours that carry beginners through intermediate projects without hardware investment.
Python forms the backbone of modern computer vision work. Install Python 3.10 or later, then add OpenCV for image processing operations, NumPy for array manipulation, and Matplotlib for visualizing results. As you progress into deep learning, you’ll choose between PyTorch and TensorFlow, both remain industry standards in 2026, though PyTorch has gained ground for research and prototyping while TensorFlow maintains strong deployment advantages. A code editor like VS Code or PyCharm makes development smoother than working in basic text editors.
Here’s what you’ll need assembled before diving in:
- Hardware: Laptop with 8GB+ RAM, quad-core processor, 256GB storage; GPU access through cloud platforms initially
- Software: Python 3.10+, OpenCV, NumPy, Matplotlib, Jupyter Notebooks, Git for version control
- Background knowledge: Basic Python programming (variables, loops, functions), high school algebra, willingness to learn linear algebra concepts as needed
- Learning resources: Free platforms like freeCodeCamp and Kaggle Learn for structured courses, official documentation for libraries, GitHub for code examples
The math requirement intimidates many beginners, but you don’t need a degree in mathematics to start. Understanding basic algebra gets you through early image processing. Linear algebra becomes important when working with image transformations and neural networks, but you can learn these concepts alongside practical work rather than spending months on theory first. Khan Academy and 3Blue1Brown’s linear algebra series provide excellent free refreshers when specific concepts arise.
For learning resources, mix free and paid strategically. Free courses from, PyImageSearch tutorials, and official library documentation teach fundamentals effectively. Paid courses on platforms like Coursera or Udemy sometimes offer more structured pathways and certificates, but they’re not necessary for skill development. The computer vision community shares extensively, research papers, blog posts, and GitHub repositories provide endless learning material once you’ve built foundational skills. Budget zero dollars initially; invest in paid resources only after you’ve confirmed genuine interest through free materials.
Before You Begin: What to Watch Out For
Learning computer vision takes longer than most YouTube tutorials suggest. Expect six to twelve months of consistent study before you can build meaningful projects independently, not the “master CV in 30 days” promised by clickbait courses. This timeline assumes three to five hours per week; if you have less time available, adjust your expectations accordingly rather than burning out trying to compress an inherently gradual learning process.
The tutorial trap feels productive because you’re consuming content and following along, but passive watching creates false confidence. After completing a guided tutorial, try recreating the project from scratch without the video. If you can’t, you haven’t learned it yet. Break the cycle by spending equal time on independent practice: for every hour of tutorial, spend an hour applying those concepts to your own small experiments.
Starting without adequate Python skills will frustrate you constantly. If you’re still googling basic syntax or struggle with loops and functions, pause your computer vision journey and spend two weeks solidifying Python fundamentals first. The same applies to NumPy arrays: you’ll manipulate image data as arrays in literally every project, so comfort with array operations isn’t optional.
Hardware limitations cause real problems, but probably not the ones you expect. You don’t need an expensive GPU to start, but you do need at least 8GB of RAM and enough storage for datasets. Running out of memory mid-training or discovering your laptop can’t handle a modest dataset kills momentum. Check your system specs now rather than three weeks into your learning pathway.
Finally, reconsider computer vision if your actual goal is web development, data analysis, or general software engineering. CV skills won’t transfer well to those fields, and you’ll waste months learning techniques you’ll never use. It’s a specialized domain requiring sustained interest in visual perception problems, not a mandatory checkbox for every tech career.
Step-by-Step Learning Process
Step 1: Build Your Foundation in Python and Math
You can’t skip the fundamentals. Computer vision code manipulates multidimensional arrays of pixel values, which means you need comfortable fluency in Python and the math that describes image transformations.
Start with Python basics: variables, loops, functions, and data structures like lists and dictionaries. You don’t need to be an expert, but you should write simple scripts without constantly checking syntax. Spend 2-3 weeks here if you’re completely new, or a few days refreshing if you’ve coded before.
Next, tackle NumPy thoroughly. This library handles the array operations that represent images. Practice creating arrays, slicing them, reshaping dimensions, and performing element-wise operations. Write small programs that manipulate 2D and 3D arrays until this feels natural, not mysterious. Budget another week.
For mathematics, focus on what you’ll actually use. Linear algebra matters most: understand matrices, vectors, dot products, and matrix multiplication (since neural networks are matrix operations). You need basic calculus concepts like derivatives and gradients because optimization algorithms adjust model weights using gradient descent. Add probability fundamentals, mean, variance, distributions, since you’ll evaluate model predictions statistically.
Don’t aim for theoretical mastery. Work through practical exercises that connect math to code. Multiply two matrices in NumPy, then understand what that operation means geometrically.
You’re ready to advance when you can write a Python function that loads a 2D array, performs mathematical operations on it, and returns a transformed result, all without Googling basic syntax. That typically takes 4-6 weeks of consistent daily practice for beginners, or 1-2 weeks for those with programming experience.
Step 2: Understand Image Fundamentals and Basic Operations
Once you’re comfortable with Python and math, it’s time to understand what you’re actually working with: digital images. This step bridges the gap between abstract code and visual results.
Start by grasping how computers represent images. An image is just a grid of numbers, pixels, where each number represents brightness or color intensity. Grayscale images use single values (0 to 255), while color images typically have three channels (Red, Green, Blue). Load an image in Python and print its shape: you’ll see something like (480, 640, 3), meaning 480 rows, 640 columns, and 3 color channels. This numerical reality is fundamental to everything that follows.
Next, explore color spaces beyond RGB. OpenCV defaults to BGR (blue-green-red), which trips up beginners constantly. You’ll also encounter HSV (hue-saturation-value), useful for color-based object detection, and grayscale conversions that simplify many operations. Switching between these spaces is a single function call, but knowing when to use each matters.
Now apply basic operations: resizing, cropping, rotating images, and adjusting brightness or contrast. These aren’t just exercises, they’re preprocessing steps you’ll use in every real project. Try implementing simple filters like blur or edge detection using OpenCV functions, then examine the before-and-after arrays to see what changed numerically.
Your first projects should produce visible results: create a face blur tool, build a basic color filter, or make an image sharpener. When you can look at an image, predict what operations would achieve a specific effect, then implement them, you’re ready for Step 3.

Step 3: Master Classical Computer Vision Techniques
You might be tempted to skip straight to neural networks, but spending time on classical computer vision techniques will make you a far better practitioner. These methods, edge detection, feature extraction, and traditional object detection, teach you what images actually contain and how algorithms “see” patterns. When your deep learning model fails later, you’ll understand why because you’ve built intuition about how visual information works at a fundamental level.
Start with edge detection algorithms like Canny and Sobel operators. Implement them from scratch in NumPy before using OpenCV’s built-in functions. This hands-on work reveals how gradients highlight boundaries and why certain parameters matter. You’ll grasp concepts like threshold sensitivity and noise reduction that directly apply to modern architectures.
Next, tackle feature extraction with SIFT, SURF, or ORB. These algorithms identify distinctive points in images, corners, blobs, edges, that remain recognizable despite changes in scale, rotation, or lighting. Build a simple image matching system. When you see how these features enable object recognition without any training data, you’ll appreciate what deep learning automates and where it might struggle.
Finally, explore traditional object detection methods like Haar cascades or HOG with SVM classifiers. Implement a face detector or pedestrian detector. These projects show you the engineering challenges, sliding windows, pyramid scales, false positives, that modern YOLO or R-CNN architectures elegantly solve.
Budget two to three weeks here. The investment pays off when you debug complex models later.
Step 4: Learn Deep Learning for Computer Vision
Deep learning revolutionized computer vision in the mid-2010s, and by 2026 it’s the dominant approach for most CV tasks. After mastering classical techniques, you’re ready to understand why neural networks work so well for visual data.
Start with neural network fundamentals. Spend a week understanding perceptrons, activation functions, backpropagation, and gradient descent. Don’t get lost in mathematical proofs, focus on the intuition of how networks learn patterns through iterative adjustment.
CNNs (convolutional neural networks) are your primary architecture for vision tasks. Grasp three core concepts: convolutional layers that detect features, pooling layers that reduce dimensions, and fully connected layers that make final predictions. Study landmark architectures like ResNet and EfficientNet to see how professionals structure deep networks. Build a simple CNN from scratch to classify MNIST digits, then graduate to CIFAR-10 images.
Transfer learning accelerates your progress dramatically. Instead of training models from zero, you’ll fine-tune pre-trained networks on your specific task. This approach works because early layers learn universal features (edges, textures) that apply across domains.
For frameworks, both PyTorch and TensorFlow remain industry standards in 2026. PyTorch offers more intuitive debugging and dominates research; TensorFlow provides stronger deployment tools. Pick one based on your goals, but learning either makes switching later straightforward.
Your first real project should be image classification on a dataset you care about, plant diseases, artwork styles, or anything that maintains your motivation through the learning curve.
Step 5: Build Real-World Projects
Tutorials teach techniques, but projects teach judgment. You’ll know you’re ready for this step when you can implement CNN architectures without constantly checking documentation and understand why certain approaches fail.
Start small. A facial expression classifier or a document scanner app makes a better first project than autonomous vehicle perception. Pick problems where you can gather or find real data within a week, not months. Kaggle datasets work, but so do photos you take yourself or public domain images you scrape ethically.
Real datasets are messy. You’ll encounter inconsistent image sizes, poor lighting, mislabeled examples, and class imbalances that never appeared in tutorials. This is where learning actually happens. Spend time on data cleaning and augmentation before obsessing over model architecture. A simple model trained on quality data beats a complex one fed garbage.
Follow an implementation blueprint that forces you to define success metrics upfront, not after training. What accuracy threshold makes your project useful? How fast must inference run? Answering these questions first prevents wasted effort.
Build three projects at increasing complexity. A beginner project takes a weekend, an intermediate one spans two weeks, and an advanced project requires a month. Document your process, failed approaches included. Employers and collaborators value seeing how you debug and iterate more than they value perfect accuracy scores.
Focus on building real systems end-to-end, from data collection through deployment, rather than optimizing benchmark performance. A working prototype deployed as a simple web app demonstrates more practical skill than a notebook with state-of-the-art results.

Step 6: Engage with the Community and Keep Learning
Computer vision evolves fast, and staying connected keeps you sharp. Join active communities like the PyImageSearch community, Computer Vision subreddit, or Papers With Code to discuss techniques and troubleshoot problems with practitioners facing similar challenges. Follow researchers on Twitter/X and subscribe to newsletters like The Batch or Import AI for weekly updates on breakthrough models and applications. Read landmark papers (start with accessible ones like the ResNet or YOLO papers) to understand how techniques developed. Contributing to open-source projects, even fixing documentation or adding small features, builds real-world collaboration skills while strengthening your understanding. As you advance, consider AI ethics training to understand responsible deployment of vision systems, particularly around privacy and bias in facial recognition or surveillance applications. Dedicate 2-3 hours weekly to learning beyond your current projects, this habit separates those who plateau from those who grow into advanced practitioners.
How to Verify Your Progress and What Comes Next
Completing tutorials feels good, but true learning means you can solve novel problems without following step-by-step guides. Start each self-assessment by closing all references and building something from scratch, a simple edge detector, an image classifier for new categories, or a custom data augmentation pipeline. If you constantly reach for tutorials or copy-paste code, you haven’t internalized that concept yet.
Project-based verification works better than any quiz. After each major learning stage, tackle a project that combines multiple concepts without a tutorial safety net. Can you collect your own image dataset, handle class imbalance, tune hyperparameters systematically, and explain why your model performs better or worse on different image types? These integration challenges reveal gaps that isolated exercises miss.
Seek external feedback once you’ve built two or three substantial projects. Share your code on GitHub and ask experienced practitioners to review it in computer vision communities or forums. Expect critiques about inefficient data loading, poor model architecture choices, or missing validation strategies, these gaps won’t surface through self-study alone. Production failures that need fixes with MLOps often stem from training practices you’ll only catch through peer review.
Your next steps depend on your goals. Pursuing CV engineering roles means building a portfolio that demonstrates end-to-end capabilities, contributing to open-source CV libraries, and learning deployment considerations. Research paths require diving into recent papers, reproducing studies, and potentially pursuing graduate education. Specializing in domains like medical imaging or autonomous vehicles demands additional domain knowledge, understanding DICOM standards or sensor fusion, beyond core CV skills. Each direction requires 6-12 additional months of focused work after foundational competency.
Learning computer vision isn’t a sprint, it’s a deliberate journey that rewards those who stick with the structured pathway we’ve outlined. The 6-12 month timeline to foundational competency isn’t just an estimate; it’s the reality of absorbing both theoretical concepts and practical skills that work together. You can’t rush understanding how convolution operations extract features, or how data augmentation prevents overfitting. These insights come from repetition, experimentation, and yes, occasional frustration.
The hardest phase typically hits around month 3-4, when the initial excitement fades and you’re deep in the mathematical foundations or debugging your first neural network. This is where most learners quit. Don’t be one of them. That discomfort signals growth, not failure. Every practitioner you admire pushed through identical struggles.
Your success depends less on innate talent and more on following the sequential steps: building Python fluency before tackling OpenCV, mastering classical techniques before diving into deep learning, completing projects rather than endlessly consuming tutorials. Each stage prepares you for the next. Skip steps, and you’ll build on shaky ground.
Here’s your first actionable step: within the next 24 hours, install Python and write a script that loads an image using PIL or OpenCV, converts it to grayscale, and displays both versions side-by-side. That’s it. One small program that proves you’ve started. The pathway forward becomes clearer with each line of code you write.
Frequently Asked Questions
How long does it realistically take to learn computer vision?
Expect 6-12 months to reach foundational competency if you’re dedicating 10-15 hours per week. This timeline assumes you already know basic programming; complete beginners should add 2-3 months for Python fundamentals before starting CV-specific material.
Do I need a GPU to start learning computer vision?
No, not initially. You can complete the first four steps using only your CPU, working with smaller datasets and pre-trained models. A GPU becomes valuable once you start training your own deep learning models from scratch, but cloud options like Google Colab offer free GPU access for learning purposes.
What’s the difference between computer vision and general machine learning?
Computer vision is a specialized branch of machine learning focused specifically on teaching computers to interpret visual information. While general ML covers many problem types (predictions, classifications, recommendations), CV deals exclusively with images and video, requiring unique techniques for handling spatial relationships and visual patterns.
Are computer vision skills in demand for 2026 job markets?
Yes, demand remains strong across industries from healthcare to manufacturing. However, entry-level positions typically require a portfolio demonstrating real project work, not just course completion certificates, so focus your learning on building tangible applications you can show employers.
These questions surface repeatedly in beginner communities because they address the practical anxieties that stall people before they start. The timeline question matters because unrealistic expectations lead to premature quitting. Many beginners assume they need expensive hardware immediately, which creates an artificial barrier to entry. Understanding where CV fits within the broader ML landscape helps learners contextualize what they’re studying and why certain concepts matter more than others. The career question acknowledges a legitimate concern but redirects focus toward the portfolio work that actually gets you hired rather than credential collecting.
Your specific path through these questions will depend on your starting point and goals. Someone transitioning from a software engineering role will move faster through the programming phases but might need more time on mathematical foundations. A mathematics graduate will have the opposite experience. The key is honest self-assessment at each checkpoint rather than racing through material to hit an arbitrary timeline.